All things Paper!
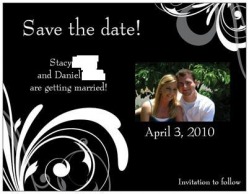
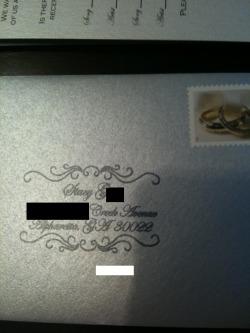
These are my save-the-dates, made with vistaprint. I mailed them with the cute wedding band stamps and the return labels below (complete with our monogram).
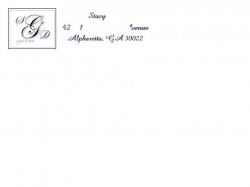

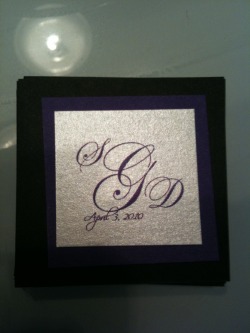
I made the monogram using Publisher and fonts I downloaded for free off the internet. The font was Cynthia Script. I am planning to use my monogram everywhere including the pocket invitation's belly band, the candy buffet bags, the OOT bags, the return address labels for the STDs and Thank you cards, and anywhere else that may possibly need it!
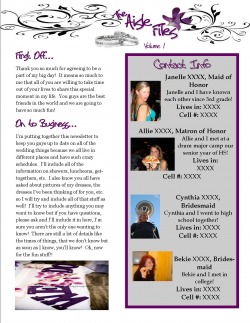
Bridesmaid's newsletter
I have 4 bridesmaids, all of which live far away from me, therefore, I knew I needed to come up with a newsletter to keep them informed. I first designed the letterhead in Miscosoft Publisher.
I then saved the letterhead as a jpg so I could place it where I needed. Next I made the document itself in Publisher using text boxes, headlines, and inserted pictures. once I was done making the newseletter I saved each individual page as a seperate jpg file so the layout will stay the correct spacing. i then paste each page into a word document so the pages will scroll one after the other. Lastly, I save the Word document as a pdf, this way I know that the layout will not change when opened on several different computers or programs. My BMs love it and always ask when they will get the next one!
Invitations
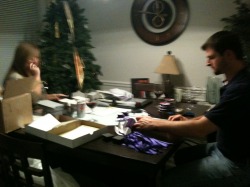
Here is an upclose picture of the inside of our pocket fold invitations. We had to make about 120 invites total. Here was our process:
We ordered from cardsandpockets.com:
130 silver metallic pocketfolds
130 silver metallic RSVP envelopes
130 silver metallic outer envelopes
400 sheets of snow white metallic cardstock for the invitation itself and the inserts
200 sheets of pansy colored cardstock for the mats behind the invite and the monogram on the belly band
200 sheets of onyx colored cardstock for the mats behind the invite and the monogram on the belly band
other materials I used:
florish clear stamp with stamp block
"stazOn" purple ink pad
300 purple rhinestones
double sided scotch tape
lasear printer
rotary paper cutter5/8 inch purple ribbon
"G" lettered wax seal stamp
purple wax sealing wax
First I decided on what colors I wanted to use. I ordered many samples from many different paper retailers online until I found the exact colors I wanted. Cards and Pockets is great! I ordered all of the paper products about with their 25% off sale back in November and it was only $280 plus shipping. The total cost of the other materials (not counting the printer, I already had that, was another $100, so overall, I made mt invites for around $400. Not bad! To mail each invite was $0.98.
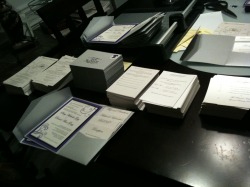
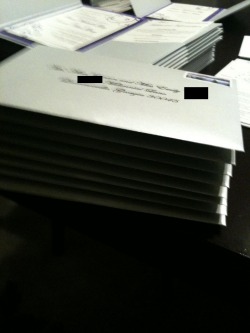
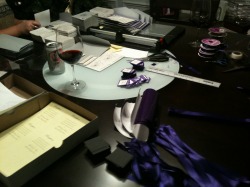
Here are all of the inserts and invites once they were made. It took many many weeks but it was worth it! Then, one night my mother, FI, and I sat there and stuffed the pockets, then the envelopes, and then sealed them with the wax. They had to be hand cancelled at the post office anyways because they were too thick for the machines, so, what a perfect time to wax seal them!
Here were my steps for making the inserts and invites:
The invites:
-Figure out your wording first, that is most important, then design the other things around that (in my case, the florish). My invite with wording is found below.
-Precut each peice of cardstock to make the invites the size you want.
-Print each invite with color on a laser printer. I learned the hard way, cardstock that is too heavy will NOT go through your printer after a few prints. I ruined my rollers and had to replace them! It is okay to get 60-80 weight cardstock, it looks just as good!
-Find a stamp with a florish you like and expereiment with different ink colors. Also, make sure the ink won't smudge after it is dry! StazOn worked great for me!
-After stamping each invited I added 2 rhinestones (the sticky stuff was already on the back) that I purchased from michaels. You can add ribbon, etc. to give it a pop from the paper!
-Using double-sided tape, attached the invite to the 1st mat. I cut my mats at the same time I cut the invite paper.
-In the same fashion, attach the invite and 1st mat to the final mat
-attach the invite and mats to the pocketfold with the same double-sided tape
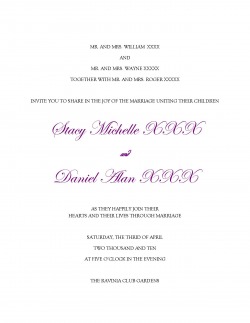
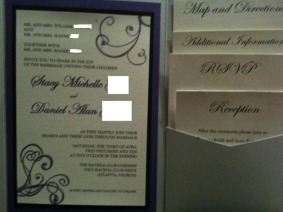
Here is our invitation wording and layout. I will print this on pearl metallic paper and then stamp and emboss a florish on the top and bottom of the invite as well as the pocket cards.
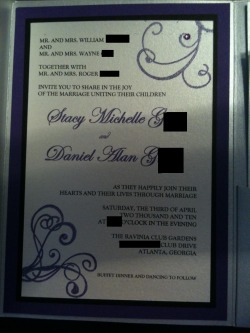
The invite once I added the stamp, rhinestones, and matted it to the pocketfold.
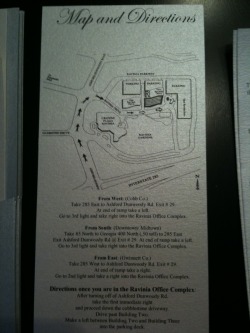
Map and Directions insert
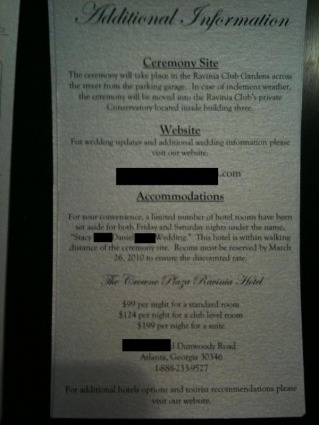
Additional information insert
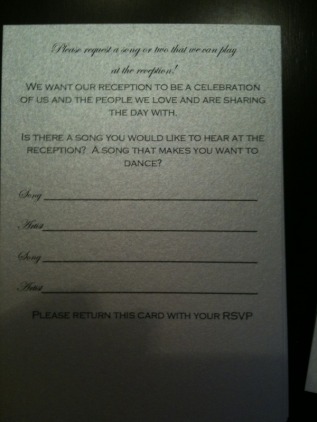
The next layer of inserts inclued the RSCP card, song request card that the guests return with the RSVP, and the RSVP return envelope.
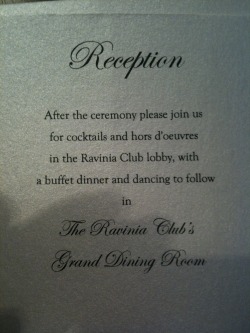
The final insert was the reception card
Here is the monogram we put on the outside of the pocketfolds along with ribbon.
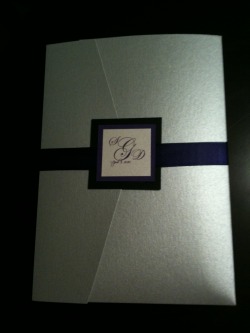
For the belly band I just printed a bunch of the monograms on the same paper as the invite and matted them the same as the invite was matted. I then took ribbon, wrapped it around and attached it to the bottom of the monogram.
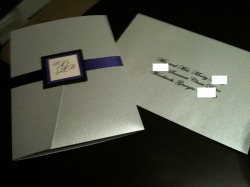
Here is the completed pocketfold with the envelopes
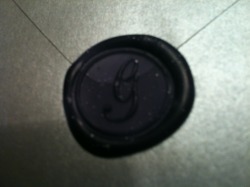
I used the laser printer to print the addresses on the outer envelopes using the font Edwardian script. On the back we sealed each envelope with a purple wax seal. The guests have all loved it!
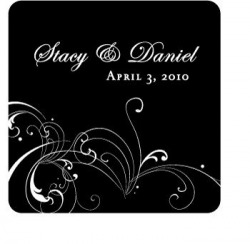
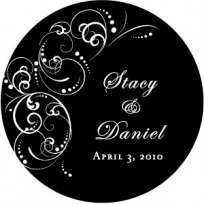
Thank you cards
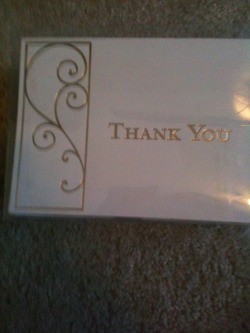
I loved that these were silver with the same kind of florish on the side as the invites.
These thank you cards are going to be used with the bridesmaid's and other gifts given at the BM luncheon. The same style is used on the invtiations to the luncheon itself. These took a while to find because I wanted something with purple on it. I ended up ordering them at "The Paper Affair."
Bridesmaids Luncheon Invites
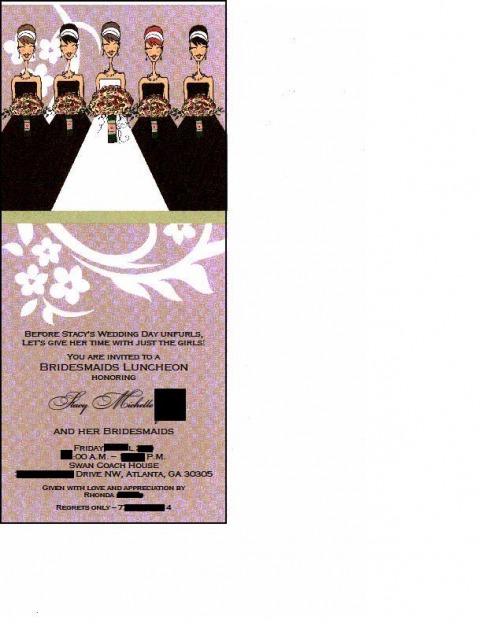
I ordered these from "A Paper Affair" as well to match the thank you cards shown above.
Stickers for candy bags
I had these stickers made by an etsy seller to go on verious things. I lvoe that the disign matches the disigns on the invitations pretty well!
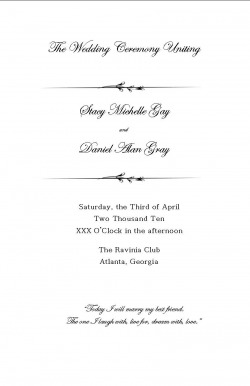
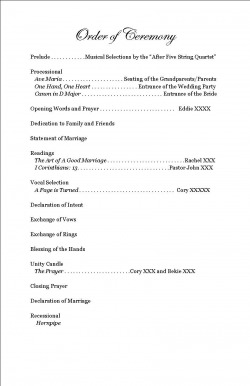
Programs
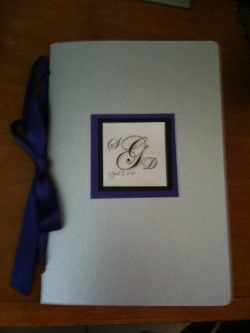
We wanted to make our programs look very similar to the invitations because we had had so many compliments on them. The cover was made from the same silver paper from cards and pockets that we used for the invitation pocketfolds (silver metallic). The monogram on the front was made the exact same way as the ones on the front of the invitation, just with larger dimensions (see above). he ribbon was the same 5/8" as the belly band.
Because we had such as issue with printing on the heavy weight cardstock of the invitation inserts we ordered a much lighter weight cardstock from Paper and More for the inside pages of the program. They printed MUCH easier!
DIY breakdown for 175 programs:
(understand that this is actually more paper than you need, I always order extra because I know it will take me a few mess-ups to get it right!)
425 sheets of pearl white metallic text card stock from "papers and more" (400 for inside pages, 25 for white part of monogram)
200 sheets of silver metallic heavy weight cardstock from "cards and pockets" (covers)
25 sheets of onyx cardstock from "cards and pockets" (for monogram)
25 sheets of pansy cardstock from "cards and pockets" (for monogram)
10 roles of 5/8" ribbon
double sided tape to adhere monogram together
scrapbook corner rounder (to round the edges of the paper to give it a more finished look)
total cost for programs-right at $200 for 200 programs!

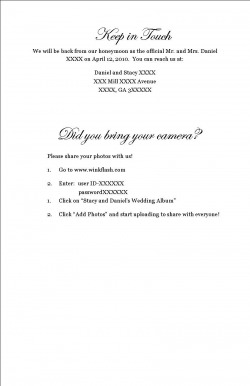
Photoshare cards and Scavanger Hunts!
I LOVE PICTURES!!!! I want to make sure I have as many pictures as possible at my wedding. We are going to have photocards on the tables as well as mail them in the thank you notes.
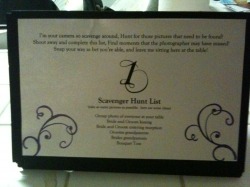
This was the coolest idea! We are going to put cameras on every table and a scavanger hunt cards in a frame. Each table will have different things that they will have to run around taking pictures of and then, at the end of the night, they leave the camera. One knottie had a great idea and thought to mail on of the extra copies of the pictures to the guests from taht table in the thank you card. Here are some scavanger hunt photo ideas:
I am your camera, so scavenge around.
Hunt for those pictures that need to be found!
Shoot away and complete the list,
Add any more that we may have missed.
Snap away as best as you're able,
Then leave me right here at your table!
Items:
Group photo of everyone at your table
-Bride and groom holding hands
-Groom watching bride from distance
-Your friends being silly
-Bride and groom’s first dance
-Couple married the longest time
-Groom and bride laughing
-Bride watching groom from distance
-Best Man Speech
-Picture of cake
-Cutting the cake
-Feeding each other
-Bride and Father Dancing
-Groom and Mother Dancing
-The sweetheart table with bride and groom
-Gift table
-Elders dancing
-Bride and Groom kissing
-Maid of Honor and Best man talking or dancing
-Cutest Couple (other than Bride and Groom)
-Worst Dancer
-Best Dancer
-a toast
-Take a picture of someone UNDER the table!
-two men dancing together
-Bride and Groom entering reception
-Grooms grandparents
-Brides grandparents
-Bouquet toss
-Garter toss
-Groom removing garter
-Bride and her mother hugging
-Bride and Groom Kissing
-Everyone Dancing
-picture of the photographer
-picture of someone at your table with the band/dj
-Reception details such as place cards, guest book, centerpieces, decorations,
table settings, favors
-Close-up of friends and family making toasts
-Bride and groom sipping champagne
-Wedding party dancing
-Grandparents dancing
-Bride laughing with bridesmaids
-Cake table
-Bride and groom cutting the cake
-Bride and groom feeding each other cake
-Bride and groom leaving, waving from getaway car's backseat
-bride and groom when they think no one is watching
-person most enjoying themselves on the dance floor
-someone hoping no one is watching
-bride sticking tongue out @ groom or vice vera
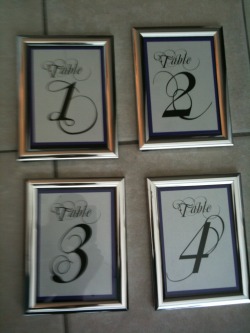
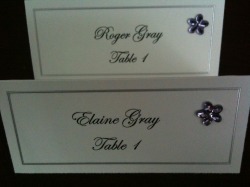
Table Numbers and Escort Cards
Timelines
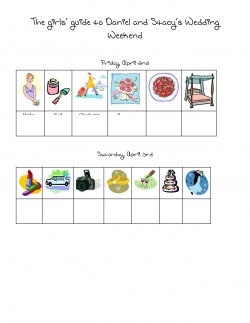
Our weekend timelines! We will be mailing these to the girls and the guys. The words below the pictures did not save correctly when i converted it to JPG but you can see the idea.
